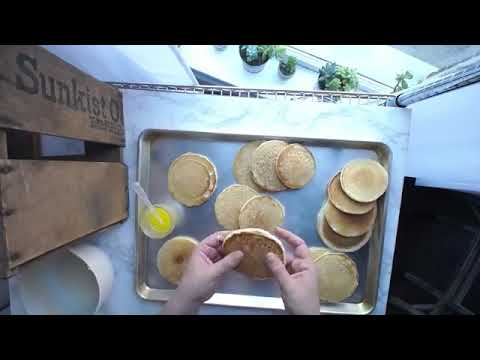
Hey everyone, Today, we’re diving into how to create perfect pancakes for food photography, from cooking techniques to the final syrup pour. Let’s jump in!
Step 1: Cook Pancakes on a Non-Stick Griddle
For the best results, use a non-stick griddle:
- Griddles are ideal for even cooking and allow you to make multiple pancakes at once.
- Lightly coat the griddle with canola or vegetable oil for a crisp texture. Avoid non-stick sprays, which can give pancakes a dull look. Preheat the griddle to around 400°F for a consistent cook.
Step 2: Control the Batter for Fluffy Pancakes
For the perfect pancake texture, prepare your batter in small batches:
- Mix only enough batter for a few pancakes at a time. Baking powder in pancake batter starts to lose its effectiveness over time, leading to deflated pancakes.
- Aim for a medium-thick consistency. Thin batter results in flat pancakes, while overly thick batter leads to uneven textures. This approach gives you fluffy, uniform pancakes ideal for stacking.
Step 3: Cook Until Edges are Set
To get even, picture-perfect edges, let pancakes cook slightly longer than usual:
- Wait until the edges are dry and the center is nearly set before flipping. This avoids rough edges and keeps the pancake shape intact.
- Lightly spray your spatula with oil for a clean flip, helping you avoid sticking or tearing. This technique creates smooth edges and a consistent golden color across each pancake.
Step 4: Arrange Pancakes for a Visual Cascade
When stacking for the camera, start with larger pancakes at the bottom:
- Place slightly smaller pancakes on top to create a natural cascading effect.
- This technique gives the stack height and dimension, making it look more appealing for syrup drizzles and close-ups.
Step 5: Keep Pancakes Fresh with Proper Cooling
To prevent pancakes from steaming and losing texture:
- Cool them on a lightly greased baking sheet. Avoid stacking immediately to maintain their crispness.
- Alternatively, use a wire rack lined with wax paper to avoid grid marks. Cooling pancakes in this way keeps them looking fresh and prevents sogginess.
Step 6: Use a Faux Syrup for Thickness
For a perfect syrup pour, opt for thicker pancake syrup:
- Cheap pancake syrup has a thicker viscosity than pure maple syrup and holds well for photos.
- You can also thicken the syrup by chilling it or reducing it on the stove if you need even more control over the pour. A thicker syrup flows slowly, making it easier to capture each droplet for that classic pancake shot.
Step 7: Add Butter and Melting Effect
For the final touch, use frozen pats of butter:
- Place butter pats on top, and drizzle with a small amount of melted butter to create a natural, melting effect.
- This adds shine and depth to the stack, giving it a fresh, mouthwatering look. Frozen butter pats hold their shape longer, allowing you to capture the melting effect gradually.
Thank you for joining today! If these tips helped, please leave a comment below, and let us know what other topics you’d like to see covered. Make sure to subscribe for alerts—these videos will move to our paid membership soon, so catch them while they’re still available.
See you tomorrow—happy styling!